Sunday, December 21, 2014

Festive Festivities

Not much modelling going on what with the end of the School year, the start of the Christmas season and the preparations for a massive renovation (which will add two bedrooms to the house – so more of a rebuild than a renovation but for accounting purposes…).

Stuff is being done however – Thursday nights I have been going to a mates place and getting on with my UFOs in the soldering pile.  I have been working on 5 Thompson Suburbans from Etched Pixels (although I think it might be the Ultima side of the Island) and then there is next year’s Area Group Challenge which I have started. 

I hope to post some pictures in the next couple of days on the Thompson’s but in the meantime, Merry Christmas to all  - I hope Santa brings you something railway related amongst the gifts and mementos.

Monday, December 1, 2014

Swallow’s End – a first attempt at a 2mm layout

Long time readers will know I tried building a 2mm Scale layout whilst still teaching in Longreach way back in 2011.  The last entry on the topic was in October of that year when I was ripping it all up to start again on the basis that I wasn’t happy with how it was going.

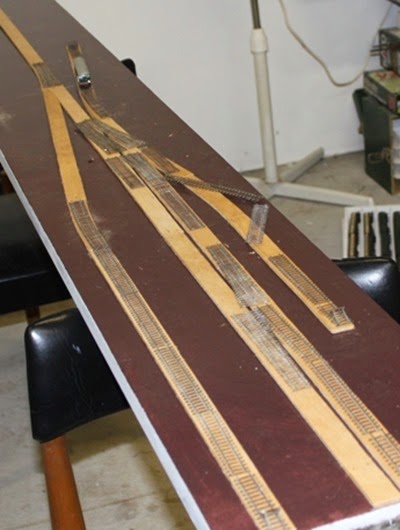
So that is what I did.  I took everything off back to the paint and repainted.  There it sat, un-touched though the move home and the fit out of the shed.  I did do a bit at one point and painted the white bits brown – one of the issues I had with the first attempt was the dirt wasn’t hiding the white board underneath so I fixed that.  I then cut 3mm ply out to match the track plan as shown below:

Swallow's End Mk 2 (1)

It was like this for sometime – actually more than some time as I looked at the date for this photo is May 2012!!  I didn’t realise it was quite that long ago.  The ply is intended to allow for the ground to be below the rail level a little bit although I am thinking it will all be up there – but it does allow for the ground to rise to the track bed rather than being too high.

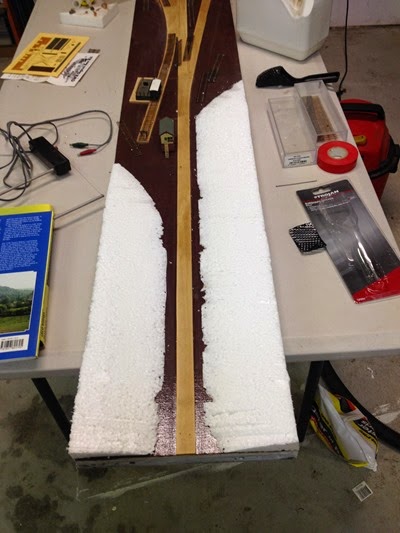
Anyway, I got all the bits done – the gap between the two sets of track was filled too – and there it sat for a little while longer.  Say 2 years!  Since the August Australasian Gathering, I have been determined to get “something” running for the 2015 Gathering so have put a bit of time in.  The results are these:

IMG_2016

Some foam terra forming has taken shape at the fiddle yard end (must get around to building said fiddle yard!).  Naturally this is white rendering the painting pointless!  I have since covered it with the first round of plaster – I am going to do an over layer than put brown filler over it all so that once again there isn’t white bits.

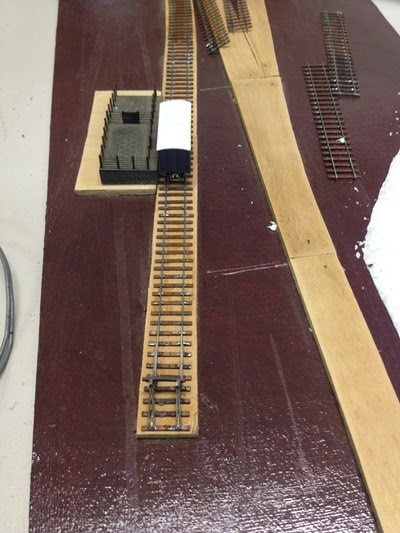
IMG_2017

Plates for structures which need to be at the height of the rail (like my Cattle Dock) have been put it.  The rail here has been glued down – only because one of the other 2mm Scale Association members in our LAG has managed to start something for the 2015 Gathering as well and he had track down so I had to!

I have also done something about the platform base in balsa wood.  It will be covered with Scalescenes sheets on manila folders (which I seem to have rather a lot of now that I have tided my desk at work). 

Further progress has taken place but I haven’t taken any decent photos – will sort that out hopefully later in the week.

Thursday, November 20, 2014

A House in Your Hand

To some of you, the title of this post will seem familiar – most likely because like me, you supported Andy Vaughan’s project on Kickstarter (here).   Now I have no connection with Andy other than being one of the supporters as I thought the idea he had was a good one and deserved to be turned into reality.

Yesterday, my collection of etches arrived.  I had put in for the Village in a Box option along with the sheds as an extra so 11 packets arrived in a parcel with some 3mm MDF packets to protect from the posties along the way.  Worked a treat – no bent items in the set.

For those playing at home, I got 1x Kit 4, 8x Kit 7 and 1x Kit 9 along with 1x Kit 11.  I had suggested the Church (aka Kit 8) but the one Andy designed didn’t really suit any of my modelling plans.  To be honest, the rural nature of most of the kits didn’t really suit either but St Alban’s Priory’s row of terrace houses is in need of refreshing, the shop I have opposite them needs replacing owing to a broken roof and the original Manor House on the layout could do with a refresh too so I was able to find places for all of the Village in a Box options which I selected – I’m going to adapt my Kit 7s into a terrace as they seem a bit small for semi-detached to me and the 8 won’t fit unless I join them up!

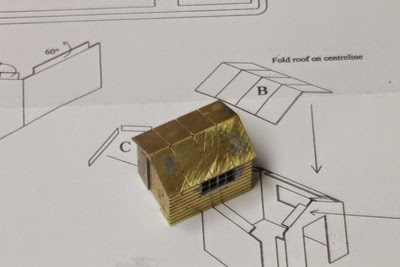
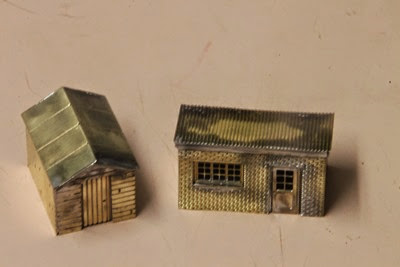
Since I got them and I didn’t have any work to do last night (marking season at the school where I teach is going to hit this weekend!) I got stuck in and made up the two sheds.  Andy’s instructions are for using glue but I soldered mine.  No dramas were encountered and I’ll let the photos tell the story.

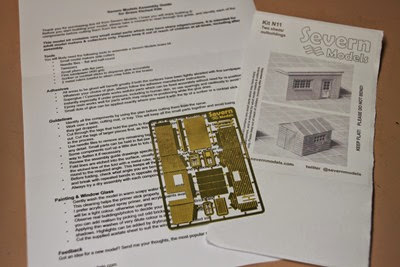
Severn Models N11 (7)

The kits all came in envelops with a picture of the finished examples on the outside.  The written instructions are generic and there is an exploded diagram on the obverse to show you what to do.  The kits are very simple and well thought out so using the pictures to build them shouldn’t cause too many problems.  The written part is a list of suggested tools, comments about safety (brass edges are sharp – that sort of stuff) and so on – nothing unusual or different about them for those with experience in the medium.

Severn Models N11 (20)

After about an hours work including cleaning it all up with my Dremel, this is what you have.  The door and windows are fairly flush – just the thickness of the brass behind.  To get them positioned correctly I tack soldered them from the front then turned it over to finish them off.  I didn’t fold up the box (as shown in the diagram under the finished model) until after this step.  I made sure it was square and then put a bead down each corner to maintain the rigidity.  Fitting the roof required a third hand because of angles but once I had two corners done, the rest was easy.  Barge boards are on the ends – they are quite small and I thought here we go but 3 out of the 4 went on with no trouble – naturally the one which was temperamental was the last!

Severn Models N11 (27)

I had only meant to do the one shed last night but since it went together so well and so quickly, I did the other one as well.  The window on the second has a fold up window sill with helped with the positioning of it.

Both kits have a couple of short comings – no guttering nor down pipes and I am pretty sure the brick one at least should have a chimney.  These are going to be added.  The timber one is going to become the fodder store on Swallow’s End (long time readers will remember this is my “stalled” 2mm Finescale Plank – however… stay tuned!) and I think the wood one might end up as a gangers hut or a coal office on same.

All things being equal I’ll get some brass bits and pieces on the weekend to put the guttering and what not on and then paint.

Now to start on the rest!

Friday, November 14, 2014

Inspiring Modelling

I mentioned in my Reboot post that Julia is one of my inspirations when it comes to my modelling.  Her work on Highclere is first class and I would love to get to see it in real life one day.  Got to save the airfare first I guess!
 
One of the other inspirations to my modelling is much closer to home.  He is one of the members of the N Gauge Gang who come to my place once a month to “get stuff done (although sometimes the stuff is talking!)”.  Ken and I have known each other for getting on 15 years and his modelling has been pretty eclectic during that time, as he got frustrated with British N, moved to US N, then changed scales completely and spent sometime doing 7mm QR Cane Trains.  He is now back in N and as a result has joined out little group.
 
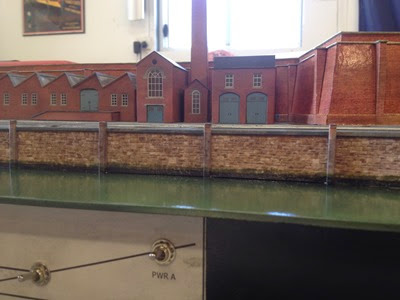
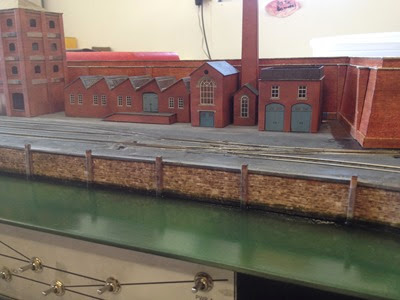
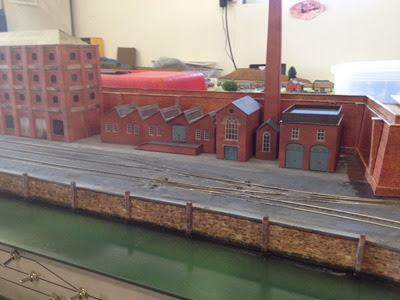
His most recent project has been to create a small shunting layout based on a dock scene.  He has used a number of kits from the Scale Scenes range along with a few Metcalf buildings and done a great job. 
 
At the October meeting he brought it along – 900 x 300 I think is the all up measurement.  Unfortunately he didn’t bring the power pack so we could only look, rather than play.  Given that he is presently putting a pile of stock together with DGs the full on playing won’t be far away. 
 
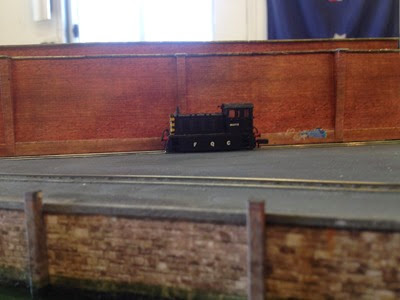
A few photos to inspire you.  The 04 is in the Etched Pixels tramkit as the FQR shunter “Mavis”.
IMG_1977
IMG_1976
IMG_1975
IMG_1974
There is a boat in the offing to be docked – not sure if cranes are going to make an appearance or if the ship’s derrick will do.

Incidentally, the 200th post on my blog!

Tuesday, November 11, 2014

A Quick Catch Up.

As I mentioned in the previous post, I have tended to spend my modelling time actually modelling (assuming I have had the mojo for it – this has not always been the case!) rather than blogging about modelling.  Consequently there have been a number of things which have been mentioned on this blog but haven’t had the whole story shared. 

So what has been done?  Well I have had a look back over the posts of this year and noticed what I had mentioned and so the following list has been compiled:

  • The makeover on St Alban’s Priory has been largely completed.  Still some stuff to do but having survived TMTEX as mentioned in the June post, I haven’t done anything else with it.  There are some photos to put up on it so I will get onto that later in the week and hopefully have the current state of play for viewing early next week.
  • The LNWR D6 on Shapeways as mentioned in the June update has been fairly successful.  I found from my test print that the buffers were slightly in the wrong spot so I did a second rendering.  I haven’t had the second go printed yet – but someone has!  I haven’t heard any bad things about it so hopefully they were happy.  I will likewise put a more detailed post up about this too.
  • 2mm Scale Association members will have read about our very successful 1st Australasian Gathering in Sydney in a recent Magazine.  We are having another one next year over the same weekend – third weekend in August – in Brisbane.  The Gathering was a very inspirational event and as a result of deciding to have it up here next year, two of us have bravely (rashly?) decided to have layouts!  So Swallow’s End has been dusted off and progress restarted.  More to come – particularly on the tar wagon.
  • I have also been dabbling in Victorian Railways N Scale building a pair of Spirit Design Y class shunters.  There is a T in the offing but these (a pair again) are being built by a mate who is going to end up with one of the Ys.  Whilst this hasn’t been mentioned, there will be some story – although not quite as many photos as I had hoped! – to share.
  • Lastly the local Area Group has been having its regular meetings and some of the modelling being done has been very inspiring in its own right.  We have decided to have a challenge next year – build a diorama in an archive box!  More on that to come too.

So not all doom and gloom and lack of progress – just a lack of sharing and recording. 

Reboot

I feel at times like this blog is a bit like the Batman movie franchise - keeps getting rebooted only to die a few months later due to lack of time, lack of enthusiasm or too much work getting in the road of posting.  After all with a finite amount of time in the week I have found that doing actual modelling has tended to be more interesting than blogging about the modelling - and there has been times when the actual modelling has been in short supply! 
 
Anyway, I had cause to go to the 2mm website today whilst at work (!) and I noticed in the blog feed at the bottom of the page a new blog I hadn't seen - Julias Modelopolis  Now I only know of one Julia who would be likely to have a blog linked to the 2mm site and I was intrigued to see it was like mine - a BlogSpot one rather than her previous postings on RM Web.
 
To cut a long story short, Julia is one of the 2mm modellers who most inspire me with my efforts - her Highclere Cattle Dock was the primary inspiration for my Swallow's End one (more of which can be found here for part one - other parts are easily found on the menu to the right once the page opens).  Now that she is back on BlogSpot the inspiration to get my blogging going again has likewise been found. 
 
Stay tuned.

Wednesday, June 11, 2014

Long time no blog – but stuff continues to happen

Well, maybe not in the scheme of things (see 2012 or 2013 for example) but  by the standards I have been trying to set this year…

So what has been happening?  Well, the May Area Group meeting came and went.  We did some spray painting of wagon kits which had been completed by members.  GWR and LMS Wagon Grey being the order of the day saw a variety of wagons get a coat of paint.  Hopefully in due course there will be photos of the finished articles.

Next up was getting ready for the Toowoomba Model Train Exhibition (TMTEX).  I haven’t taken St Alban’s Priory out since May 2008 so a bit of time was spent in finishing off the grass, trying to get the fences replaced (didn’t happen) and a few other bits and pieces (also which didn’t happen!!).  The main effort was wiring up the yard so that it was able to be shunted.  This sort of happened but I ended up with a broken point 48 hours before pack up.  No time to replace (ballasted section!) so we ran a truncated shunt service over the weekend. 

TMTEX is rapidly replacing the Brisbane Train Show as the best in South East Queensland – and from an exhibitors point of view, it has been the top one for sometime.  The Darling Downs Model Railroad Club lets us camp in the exhibition hall which tends to mean late nights chatting with fellow modellers or tinkering with layouts.  All good fun.

Since TMTEX I have been working hard at my actual job!  Nevertheless I have managed to get up to speed with Autodesk Inventor (which as it happens I have had to learn for my job!) and the result is I have been having a go at drawing 3D wagons with a view to at some stage printing and seeing what happens.

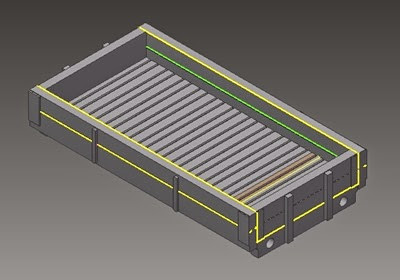
So… ta da… my first effort is a LNWR D2 (or D6 – the axle boxes changed) Two Plank Open:

LNWR D6

People with access to LNWR Wagons Vol 1 by the LNWR Society can have a look at page 73 (I am aiming at the D6 personally) and see what you think.  The bolt heads haven’t been added yet and I need to also put the inside groove on the ends – to match the green line on the side.  Any comments/thoughts/criticisms welcome.

Lastly, the 2mm Scale Association Australasian Gathering has been taking up some time – members of the 2mmSA will have been able to read the news in the latest Magazine and via the VAG.  Hopefully there will be art to display here in the near future.

Saturday, April 19, 2014

Atso-Cad LNER N2 from Shapeways

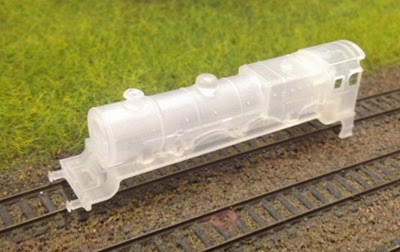
As I have mentioned in a couple of previous posts, I obtained one of the Atso-Cad Shapeways 3D prints for an N2 along with a bunch of other stuff.  Now none of the things I purchased were anything which I was in a position to complete straight away – the locos needed chassis and the wagons likewise – the N2 was the closest and, being a little impatient, I didn’t wait and got stuck in.
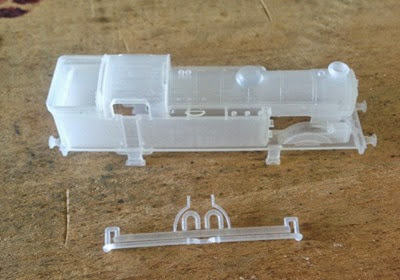
N2 1

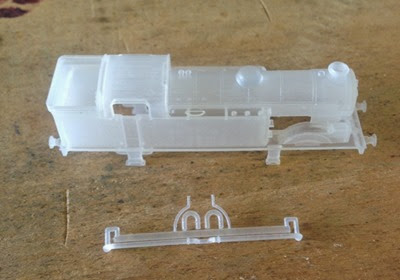
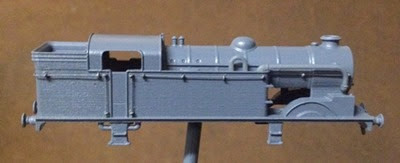
The picture above shows what you got for your money from Shapeways.  The bit at the front provides the pipes for the condensing apparatus which was fitted to those locos which were shedded in the London region to enable them to work in various underground sections.  If you don’t need these, then three holes – which can be seen on the forward part of the tank side – will need filling with milliput or similar.
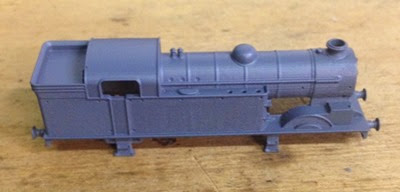
N2 2

So being impatient, I hit the body with some grey primer to see how it looked.  Not bad really.  You can see the stepping on the boiler and the tank sides but it is fairly fine in real life and doesn’t take a lot of effort to sort out.  From here, I did some light sanding with various grades of wet and dry, gave the whole lot a scrub with some Jif and an old tooth brush and then primed again to see how it was travelling.
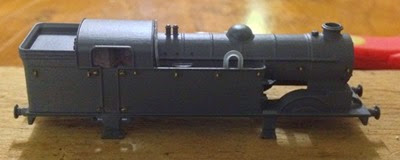
N2 3

As I was pretty happy with the look of it following the second priming coat, I started to add the detail.  The first bit of the condensing pipe work was put on the tanks but the hand rails have to be done before the second bit so I got on with those.  25 holes later… 
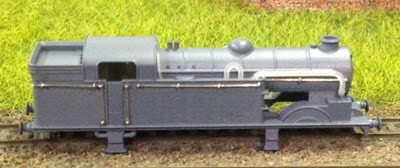
N2 4

Handrails are one of these things that tend to end up being a bit over scale and these I expect are no exception – I used 0.2mm wire in etched knobs – but to leave them off would be worse I feel.  In this case, the tank hand rail is on the side – some locos had hand rails on the top of the tank and a couple of pictures I found had them in both spots.  The location also moved around depending on the period – and within periods.  Photo references are a must if you are wanting to be spot on for a particular loco.  As I hadn’t picked a number, I went with the holes Steve had allowed for in the print.  The knobs were fixed with super glue.

According to Shapeways, FUD can withstand temperatures up to around the 80C mark – I solder at 375.  However, I felt that a quick in and out with possibly a higher than normal temperature to ensure a quick bond would work and so it proved.  I did the hand rails with the iron at 400 and had no dramas with melting.  A couple of knobs needed to be reglued but I am not sure if that was a result of the heat or a result of not having stuck them in properly the first time. 
N2 5

Having completed the hand rails the last bit of pipe work was stuck in, the whole lot primed again – which has had the effect that the sides are very much losing the stepping under normal viewing although I noticed in the photo that the bunker side in particular is still showing.

The primer was left to dry for a day and a half before I sprayed it with gloss black.  I still hadn’t decided if I was going LNER or BR but in either case a black loco was the go – I use rattle cans for basic colours and whilst I have LNER Green from Precision Paints, I wasn’t setting up for painting one small loco – the other couple of things I want to paint LNER Green haven’t got to the painting stage yet.

The gloss black was left for 48 hours and then the really fun job of transfers started.
N2 6

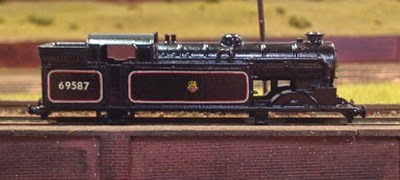
I used Fox for this one and settled on BR mixed traffic as I didn’t have the means to do any LNER – other than the lettering.  The Fox system involves putting a black transfer over the red/white one to separate the lines but having done a trial I wasn’t impressed with the look so removed it.  One of those cases where, to me at least, the right way looked wrong, but the wrong way looks right.  The number chosen was picked for two reasons – one, the loco was based at Hatfield, which is the other end of the GNR branch from St Alban’s and, while I don’t have a picture of an N2 at St Alban’s, it is at least plausible that this loco made it down the branch at some point.  The second reason was it used 5 different digits!

So this is the state of play at the moment – the buffer beams have been painted red and the whole lot coated with gloss clear to seal the transfers in.  Next problem is a chassis.

Steve Da Costa suggests putting the loco on a modified Farish Std 3 Tank chassis.  I have a Std 3 (well had is probably the more accurate description now) and so I pulled it apart and made a start on hacking the chassis.  Pretty soon in, I found that the biggest issue was the wheel spacing was wrong – and the biggest glaring error to me was the Std 3 has its wheels more symmetrically spaced than an N2.

So no wheels at present – I am considering using the parts to make a chassis with new connecting rods but a better solution would be an etched chassis.  As it happens, I am hoping Steve releases his J50 soon to the general punter and it has the same wheel base and spacing (albeit with wheels one foot smaller in diameter) as the N2 so an etched chassis would work for both potentially.  The sticking point there will be that while I can get wheels from the 2mm Scale Association this won’t help for an N gauge layout.

It is a cracking little kit and highly recommended – I have a Langley one from 20 years ago and this really shows it up for the compromise that it is.  An LNER and GNR (!) pair will follow, once I work out a suitable chassis arrangement.

Monday, April 14, 2014

South East Queensland Area Group Meeting–12 April 2014

No photos this month – too busy!

The usual monthly meeting took place at your humble correspondent's shed last Saturday with 6 starters and one late comer in attendance.  There wasn’t a theme to this month with everyone working on various projects.

Kicking off – I was working on my Atso-Cad designed N2 (which should be the subject of it’s own blog post hopefully next week, weather willing).  I am still in a bit of a bind when it comes to the chassis for it – more of which anon.

Ken (a returning member – he had N some years ago then dallied with Suger Cane Trains and Trams but is now back) was building a Scalescenes Factory/Warehouse (T026).  He has actually combined two kits to get the size he is wanting but was commenting on the number of windows he had to cut out!  This prompted a discussion on obtaining the windows themselves (OHTs are pretty old school now with data projectors so sources are drying up) and how they could be made to be different colours (currently they coming in any colour you like, so long as you like black).

Anthony made a start on something a little different – a rolling stock kit.  He has obtained a couple of the Etched Pixels LMS Fish-X kits to go on the N Gauge Society Stove R chassis.  Compared with the 2mm Scale Association ones, these are a doddle to build and hopefully we will see them close to completion next month.

David had managed this month to bring along the various parts to the 2mm SA quartering jig but still failed to achieve success owing to bending a couple of things which he didn’t have replacements for.  However, he was able to make a start on his Shapeways GWR Cattle Wagons with a view to painting them at our next meeting.

Barbara and Don continued working on their collection on wagon kits with some progress being made on their NGS kits which I had made examples of last month. 

Ben, coming late (but in time for a feed…) didn’t actually get anything done but fortunately did bring with him his ultrasonic cleaner which will make the sorting of chassis for Cattle Wagons, bodies for Cattle Wagons and assorted other kits which I hope to do in the next few weeks a bit easier.

Monday, March 31, 2014

Shapeways

For a while now I have been keeping an eye on Shapeways and the various offerings for the N Gauge/Scale or 2mm Modeller thereon.  The Eye was moved into action once I got to see a finished product – Ben’s Atso-Cad Patriot which I wrote about briefly here (scroll down to about halfway) and I recently took delivery of a collection of models – and yes, I know I have a lot in the UFO pile already!

First up was my own Patriot – destined to be 5504 “Royal Signals” (my mother and both her parents worked in various incarnations of the Royal Australian Signal Corps during the 1960s and WWII respectively) although I am not sure if it will be LMS Crimson or BR Green at this stage (might just get another one and do two although not necessarily of the same loco!).

Patriot 1

I took advantage of Steve’s other work to purchase his N2 kit.  I have one of the Langley examples – I seem to remember working on it back in 1996 so it has been around a while.  It has always looked the part to my eyes which have had their bias based on the photos in Haresnape’s “Gresley Locomotives” but Steve’s effort is much nicer.  It is designed to go on a Farish Std 3 Tank chassis which requires a bit of hacking and so forth.  I have made a bit of a start on this one so there will be more information coming later in the week.

N2 1

Way back in the days of Swallow Street (RM Webers from Mark III might remember this essay into 3rd Rail BR Blue while I was out in Longreach – there was a cheeky baby who crawled under the layout at one stage and had a lovely time playing with the wiring – said kid is now at school and recently turned 5!) I obtained the BHE kit for the Class 128 parcels railcar. (I also got the 129 kit – neither have made it much beyond an initial inspection of the contents.)  Again, those who frequent the various Forums maybe aware that a 128 was made available on Shapeways with the intended chassis being the Dapol 121/122 chassis.  When I get around to getting another 121/122, this will move up the pile.

128 1

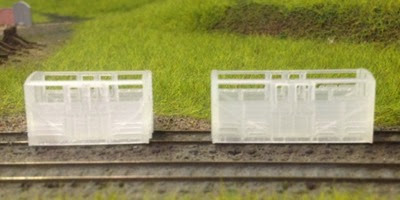
2mm Scale Association VAG members will be familiar with the tale of Ian Smith’s GWR Cattle Wagons – I was lucky enough to have put both types – the W1/5 and W3 – into my shopping cart prior to Ian being told that there were flaws and Shapeways didn’t want to print them.  So I figured the worst that would happen was they’d be rejected.  They weren’t and printed very nicely in FUD.  Again, a bit of a start has been made here too so an fuller comment will be forthcoming soon.

GWR Cattle Wagons 1

Lastly I got some bits and pieces – some various lengths of permanent coupling for Dapol NEM sockets – principally for my HST but also to see about the Teaks I have.  With a bit of work they fit the Bachfar Mk1s too.  Details to come.  I also got a set of the Atso LNER bogies.

All in all, very impressed with the service and the finish.  About the only thing which had me scratching my head with the whole process from order to delivery was why it took UPS from the 18th of March to the 21st to get from Holland to Sydney, Australia via America but then from the 21st to the 26th to get the 800kms from Sydney to my place!!!  

Monday, March 10, 2014

South East Queensland Area Group Meeting – 8 March 2014

Our monthly meeting took place last Saturday with members working on their own projects – or attempting to!  David had planned on have a go with his recently purchased quartering jig but found he had left a couple of critical things at home – like the chassis he was working on.  In the end, he added to the potential pile of UFOs by searching around the 2mm Scale Association Shop and Shapeways looking for bits and pieces.

Graeme returned after missing last month, away at a BRMA committee meeting.  He  was seen in possession of a Chivers GWR Python kit and enthusing over Ben’s latest purchase – the new Jinty.  All agreed the latest Jinty makes the old one look exactly that – old.  Quite a few are likely to be heading down under considering there are 5 of the group who model the LMS in general terms and all can justify at least one.

Ben was working on some Chivers Horseboxes, finishing off the painting on them.  While he was working on that, your correspondent got out the un-made NGS Kit 47 and 48 from the UFO draw.  These are ex-Parkwood kits which have been released by the NGS with transfers and so forth in the box.  Similar to the old Jinty, they are showing their age but provide something a little different in a train so worth it if you are a NGS member – and as they are very basic, 5 parts to the kit, a pretty good entry to the art of kit building.

kit 47 48

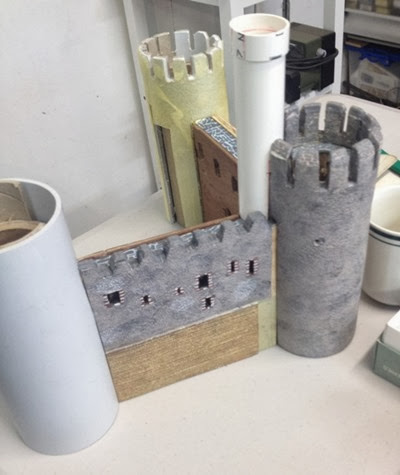
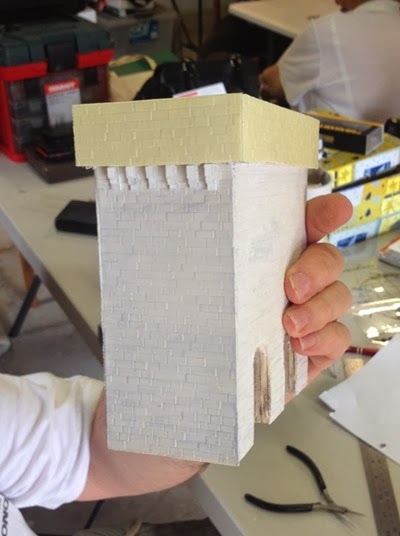
Anthony and Greg spent some time working on one of Anthony’s locos which wasn’t running well.  Initial thoughts turned towards the track laying (bear in mind this was done 15 years ago and all my locos run happily…) but eventually it was found some back to backs needed sorting and then things worked ok.  Anthony also brought along his model of Conwy Castle – or the current progress.  Readers of his blog on RM Web will doubtless know all about it – everyone else can find it here

Conwy 2

Don and Barbara were working on something that looked like a scratch build but I am afraid I didn’t get a closer look so can’t comment!! Sorry!  Barbara is interested in finding out what the loco was on 1E25 on Monday 7 June 1971 (1600 Edinburgh Waverley to Kings Cross arriving 2157 – best bet so far is a Deltic but which one would be nice.  Possibilities  are 9009 and 9020 as they seemed to be on KX-Ed and vice versa turns then).  If you know or have a photo, can you please get in touch.

Tuesday, March 4, 2014

St Alban’s Priory – before the makeover

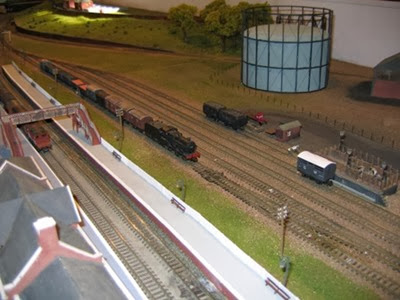
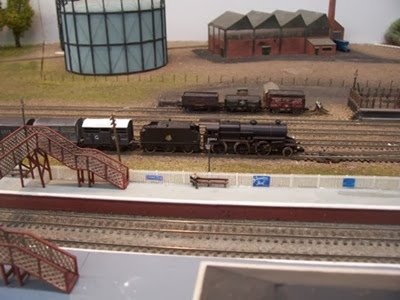
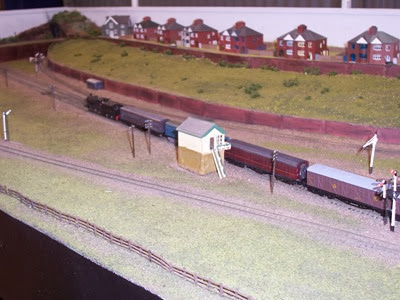
I found these pictures whilst cleaning up the external hard drive and thought, given the work which is currently taking place on the layout, they were worth sharing to show what it used to look like.  The photos have been taken at various shows and in my shed over the years from 2003-2008 and give a pretty good idea what it all looked like.  I have been getting some more work done, but it has been a bit slow over the last couple of weeks but hopefully there will be a new instalment at the weekend – in the meanwhile, enjoy.

RMWeb - St A 3

RMWeb - St A 2

RMWeb - St A 1

Stuff 035

TMTEX 001

St-Alban's-1

100_3942

St Alban's 7

Sunday, February 16, 2014

Layout Makeover – Part II

As the photo below shows, the fence around the St Alban’s Gas Works (the only similarity with the real one is the name!  If anyone can point me at a book about the St Alban’s Gas Works and the rail workings to same, I would be grateful) was done with absolutely no idea of reality.

St Alban's 6

I decided – on a whim; in desperation; I cannot remember as it was quite some time ago – to use Peco track pins to represent fence posts and “imagine” there was strands of wire between them.  Now for keeping sheep in on a station in Australia, that is about all you need.  However, having had a look at Frankland (start here on the N Gauge Forum – scroll down for the Walthers Gas Holder or have a look here at page 6 of the posts on the New Railway Modellers Forums.  Google also brings up various incarnations of RMWeb with more)* for the inspiration for the changes which are detailed below.

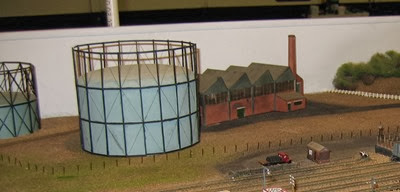
The first thing which I did was get hold of one of the Walthers Gas Holders – although that pre-dates the finding of Frankland.  I received the kit for my birthday in 2013 and got some building done, but the glue I had wasn’t working so it was put aside until I was able to replace the glue.  New glue got this year and the kit was completed.  The kit is good in that it gives two height options for the tank – I opted for the highest but I am planning on getting a second which I will do at the lower height for variety.  During the day the heights would vary depending on usage and manufacturing.

Gasometer 2 

This is it completed and given a coat of Humbrol 64.  Having gotten in touch with Mark and asked him how he did it (see page 11 of the N Gauge Forum discussion for details) and discovered I should have waited to put all the lattice on.  Live and learn.  So the gas holder is as above at present while I think about what to do – visit to the LHS might be in order to see about paint options and then do detailing and weathering.

Attention then turned to the fence.

I decided that something needed to be done with it as I was getting ready to continue the refresh of the grass from the pervious session (Part I Post) and felt that as the fence wasn’t right, I was going to have to fix it first, then do the grass.

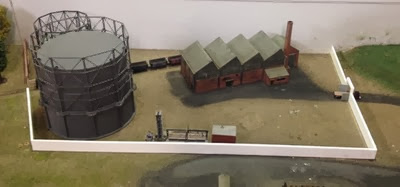
So several nights later, the Gas Works is now surrounded by a wall, a scale 10 feet high and 18 inches thick – double bond I think it is called.  The wall is made out of 1mm styrene laminated to give the 3mm required thickness.  I am planning on covering it with Scalescenes aged red brick paper.

Gas Works Wall 1

So far, the first bit has been done – the picture was taken almost as soon as I had glued it so the white bits are actually undried glue. 

Gas Works Wall 2

I decided that while the road entrance would have some seriously solid gates, the rail entrance would get Peco level crossing gates.  One, they fitted the hole, and two, the story goes, that there was seriously solid gates until one day they jammed whilst being opened to let the train out, and as the train was already approaching and failed to stop, the gates were opened by the gentle attentions of a 4F and 16 empties… Meanwhile, back to applying brick paper – and printing some more.

* too many forums to keep track of to be honest – hence my blog!

Sunday, February 9, 2014

South East Queensland Area Group Meeting - 8 February 2014

The Monthly meeting was held yesterday with the central theme being Templot.
 
As a number of us are interested in building our own track and I have previously had a go at Templot I gave a short overview of it.  At some stage later in the year, when I have refreshed my memory better as to how it works (work managed to get in the way in the week leading up to the meeting so I didn’t get around to running through it as much as I had hoped – and as users will know, it does take some getting used to) we will revisit it.
 
In other activities which were either going on or discussed, Anthony continued some work on his model of Conwy – for full details of what he is planning on building and his progress see his blog on RM Web here.  In the meantime a photo of progress on one of the tubular bridge ends is below:
Conwy
 
Ben brought along his Atso-Cad Models Patriot which he had obtained from Shapeways.  He has a spare Union Mills Fowler tender to put behind it and the Fox lining to go it.  The lining is for a different, slightly over scale kit (!) so a bit of cutting and shutting to get the lining to fit the body and tender will be required.  Again, photo below:
Patriot
 
New member Ken showed us the results of his experiments with wire he had obtained from a fishing tackle shop (BCF for the Australians reading) in whipping up the loops for a DG coupling in seconds with no soldering required.  Self was quite impressed and I plan in visiting the local branch sometime in the very near future and doing like Ken has done – make up a batch and have them ready to go.  Once again, a photo below.  The jig is a modification to the DG one available:
DGs
 
Other activities involved checking out a pair of new Farish Fairburn tanks which, at the time of writing, have been the cause of some discussion on a number of forums over “wobble” in the running.  Both locos were adjudged to be excellent by the observing gathering – not so much the Dapol A3 on test which required quite a bit of mucking around with a Dremel to get the overzealous wheel blacking off to improve the pickups and running.  I suspect had we been closer to the supplier rather than 10 time zones away, it may have gone back but after a couple of hours of work it was deemed satisfactory.
 
We were also lucky to have a visit from Harold from Modratec who is a bit of a signalling guru.  His knowledge certainly had your scribe going back to the drawing board with what he thought was the correct way to signal a layout!  Anthony organised getting the first of three planned lever frames and others present took advantage of Harold’s knowledge.  Later in the year we will invite Harold back to share his knowledge again – but we might be better armed with our questions next time.  I think he got off too lightly!
 
Discussions also took place surrounding the 2mm Scale Association Australasian Gathering planned for later in the year.  A 3D Rapid Prototyped wagon is planned for those attending to take home as a souvenir and a decision as to which, will be made in about 6 weeks.  Various options were discussed with some finding greater favour than others – and the N Gaugers were getting a say as they will have the opportunity to buy the wagon in due course and fit N wheels, providing they accept it will be at 1:152, not 1:148 (or even 1:160!).
 
Next month the dark art of wheel quartering using the 2mm SA jig will be attempted by David and I – hopefully with Graeme’s assistance.  TOUs will be back on the agenda sometime soon and the usual round of UFOs will be tackled along with DG couplings.
 
As ever, if you are a member of the 2mm Scale Association, the N Gauge Society or BRMA and would like to join us, please get in touch.

Sunday, February 2, 2014

Cattle Wagon Roofs

The last entry about the D120 Van coincided with my return to work after 6 weeks holiday over the summer and the resultant demands on my time have curtailed the pace of activity which had characterised January.  Still, all hasn’t been lost as I have managed to make some headway on the Cattle Wagon Saga which has been mentioned a couple of times previously.

One of the big attractions of joining the 2mm Scale Association was the availability of a variety of kits for similar wagons – indeed, if you are keen, there is over 10 different kits for Cattle Wagons available from the Association from 3 pre-grouping railways, 3 of the big four and BR (the GWR seems to be the one missing).   Compared with the offerings from N Gauge RTR manufacturers (Peco and Farish) the opportunities for variety in your train abound, especially since cattle were freighted reasonable distances to market or to farms following purchase and the wagon would go the distance, rather than transhipping the beasts.

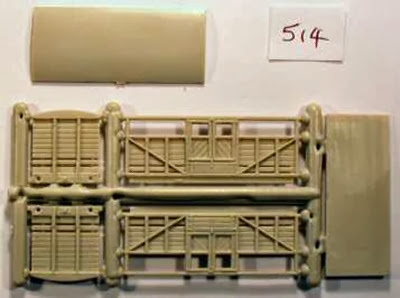
The LMS Twin Pack kit (2-514 – see below) is one of the older kits for the Association being as it is injection moulded plastic, rather than etched nickel silver like the newer kits (which have been the subject of previous posts).

s2-514

Now Ben had obtained 8 bodies (so 4 kits) in various stages of completeness via the Bay of E.  When he passed them to me to complete for him as part of a barter deal involving some GUVs only two of the plastic roofs as shown came too.  There was an etch (2-236) of roofs for LMS, MR and SDJR roofs which, considering the theme of his layout, seemed like a good idea – the 8th roof was made using a plastic van roof.

The problem with this kind of detail is finding out if the bodies you are putting the roofs on are, in fact, the right bodies.  Certainly the kit is for LMS Cattle wagons but which of the five etched roofs are LMS, which MR and which SDJR – and does it matter?

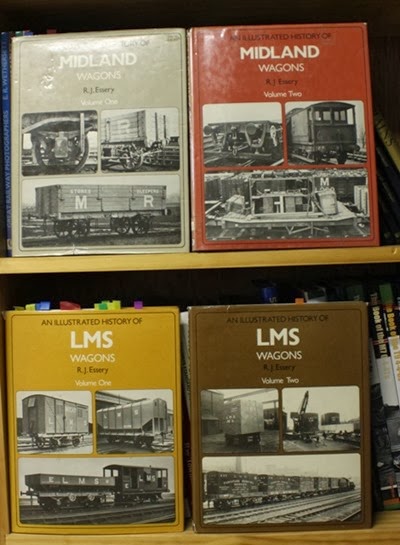
Well fortunately, Ben has these books:

Reference Section

and on consulting them I was able to ascertain that the body is a MR design which was built by the LMS until they came up with their own, newer design.  Good.  Even better was I was able to find pictures in the MR Book which showed that all of the roofs (there are 4 designs for the 5 on the etch) are appropriate to use.

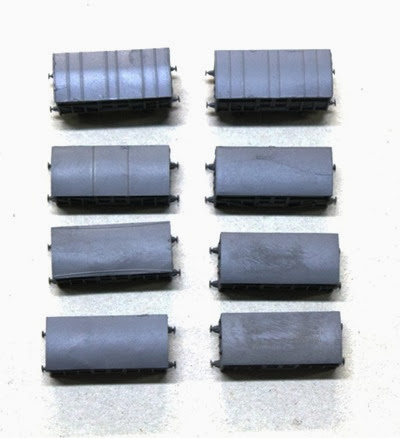
LMS Cattle Wagon Roofs

Top row – etched multi ribbed roofs (the only two which were the same on the etch) of which there was a photo in the MR book showing this roof type.

Second top – etched left, made up plastic right.  The plastic had a crack in it so will require some filler before it is finished.

Second bottom – etched with rain strips left and original plastic roof from kit on right

Bottom row – plain etch roof on left, and original plastic on right.

The plastic roofs will need to be smoothed/filled before completion.  The plain etch has some bumps in it from the rolling process – not sure how as the other 4 rolled ok with no bumps and they were done first!

So even though there are 8 bodies the same, by using the various roof options available, a variety of wagons become possible – and as homogenous block trains were a thing of the future when the S&D was in operation, then it is a good thing.  Now to complete the chassis to go under them, then paint, then transfer…

Wednesday, January 22, 2014

Atso-Cad LNER D120 Pigeon Van

The bloke who I am making all these cattle vans for also managed to obtain this little gem of a kit – I was too slow when County Rolling Stock had them.  Steve Da Costa, the designer, now has a Shapeways shop (here) with Ben having obtained his Patriot kit (and very nice it is too.  However, too many UFOs here in the queue to get one…yet) from him via this means recently.

Anyway, I have had this kit of Ben’s sitting around for nigh on 12 months and I thought it was about time I got it sorted – and it was a nice break from cattle (more of which later).

Atso D120 1
This first picture shows pretty much what you get.  Wheels, chassis and body with some brass and white metal detailing for the underframe.  The original, as I understand it, was Rapid 3D prototyped then cleaned up to create a master, from which a mould was made and then a production run cast.  Hopefully Steve adds it to his Shapeways shop as I would mind having a couple and another of our LAG lads would like some too.

As there is only two parts to the main bit of the kit and minimal flash, this didn’t take long.  Drill out for the whitemetal buffers, glue in tophat bearings for the wheels, glue on the vacuum brake cylinder and the brake shoes – which you can just see if you look hard enough – and you are ready to paint.  The photo above took roughly half an hour to get to from opening the box.

A quick glance at Historic Carriage Drawings Vol 3 by Tatlow gave numbers, liveries and some useful drawings which showed two pipes for steam and brake were fitted.  Ben models the SDJR at Sturminister Newton (see here on RMweb and then follow links from there to get a better idea) tentatively in the 1950s (well there is a green 9F which often makes an appearance hauling a long rake of coaches – having said that, the other day a Class 60 was running!) so the model was finished as E70199 in BR crimson.  I found some pipes in the bits box to put on each end.  Once glazed and what not, a light dust of Tamiya powders gave it the necessary cross country look.
Atso D120 2

Monday, January 20, 2014

Layout Makeover – Part I

Last year I had to make a choice – refresh my current layout (which was built back in 2000, and then put in storage in May 2008 before being re-erected in January 2012) or scrap it and build a new one.  A number of factors had to be considered – not least the cost in both dollars and time for building a new one and the fact that I would be lacking a layout for the time it took to get a new one up and running.  In the end, I decided to refresh St Alban’s Priory.
 
The first steps which I have taken involve redoing all the grass, using static grass.  Back in 2000, static grass wasn’t something I had heard of – I assume it was around but no one I knew was using it then.  Fast forward and it seems to be the bee’s knees, cat’s pyjamas and mutt’s – well you get the idea.
 
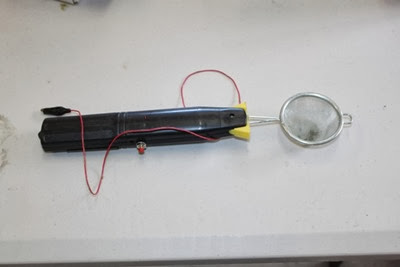
One of the LAG members had acquired a static grass applicator – Google if you haven’t seen one but basically its a metal tea strainer wired to a electric flyswat.  Don’t earth it when on as it give a loud crack, scares the mutt and makes you jump, spilling the contents of the strainer.  Every time.  Yes, every time you earth it – you don’t get used to this.
Applicator
 
I have managed to get quite a bit of the layout done – I should work out the square footage of the layout but the scenic area in total is roughly 800mm by 4000mm.  Obviously the ballasted track, goods yard, platform and gas works all takes up a fair chunk of this but there is quite a bit of grass coverage too.
 
The five photos take you through the sequence I have adopted in doing this – I did take one with a ruler to give a sense of the size but it didn’t show up.  However, the length of the earthing clip (you have to create a circuit obviously or the static charge doesn’t work) is a bit over 450mm (or 15 inches if so inclined) and I usually do an area with a nail in half way – so about 800mm long by what ever wide.
 
 
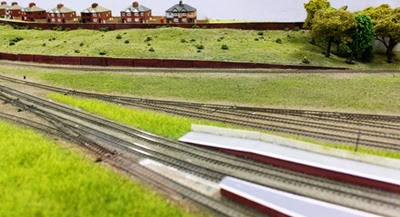
Grass 1
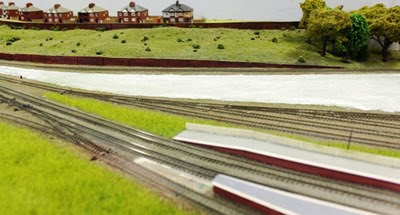
The beginning.  The foreground has already been done – and the end of the platform used to end in the world's narrowest ramp so it has been removed (no barrow crossing anyway) and will be replaced with a square end with steps for anyone who needs to go that way.  Signals for the platform will be going here too – possibly colour lights but not sure.  Working in any case.  The area to be treated is the big green patch beyond the ladder of points for the yard.  The line over the back in front of the retaining wall is to the Gas Works which is just out of shot to the right of picture.  The centre house is the subject of the previous post here.  The grass to be replaced is some foam based product by Woodland Scenics, the code and title of which I have long since forgotten but it has faded quite a lot – in a good way, but faded none the less.
 
 
Grass 2
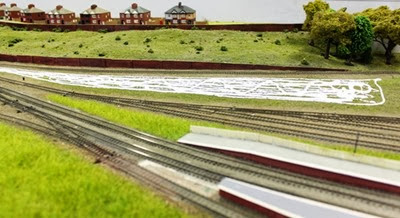
The area which is going to be attacked gets covered in PVA glue.  We experimented a bit with the viscosity of the glue and found the thicker the better so it goes on neat and is then spread around with wet fingers – keep a bowl of water handy to dipping your fingers in to keep them wet rather than gluey.  The water helps with the conduction of the electrical current later.
 
 
Grass 3
This shows the area covered with glue – it goes off a bit to the left and to the right (there is a base board join to the right – it went up to this but no further.  I didn’t want to glue the baseboards together  by accident).  I have also kept it back a bit from the track – not quite up to the ballast shoulder simply because with the layout set during the steam era, not much grew where the trains went.  St Alban’s Abbey (on which this is based) was a fairly busy station for a terminus – the Gas Works playing a critical part in the density of the traffic.
 
 
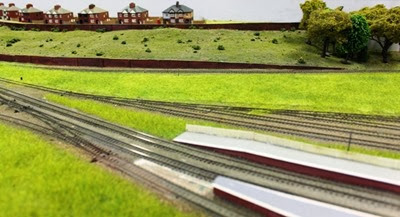
Grass 4
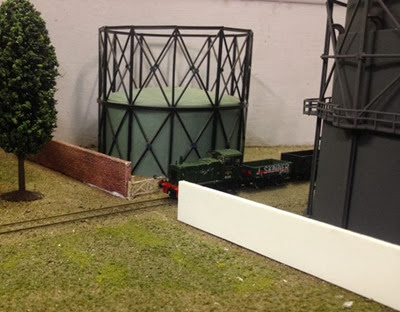
Grass done.  You can just see in the middle of the grass at the back the 12mm nail I used to provide the grounding pole for the applicator.   At this point the grass hasn’t been vacuumed to get the surplus off so it is quite lumpy.
 
 
Grass 5
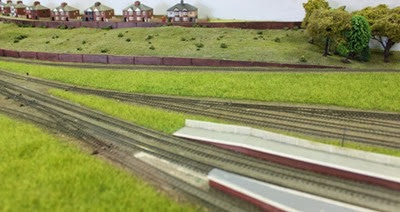
Once the glue has dried (out here in Australia in Summer this is overnight if, like me, you do this after the evening meal – if I did it after breakfast the glue would be dry by lunch!) and using a piece of cloth or old nylons over the end of the nozzle, carefully vacuum the surplus up and return to jar.  The slight difference in colouring in this pic is probably due to the fact that it was taken at 0930 rather than 2130 like the previous 4.
 
Grass 6
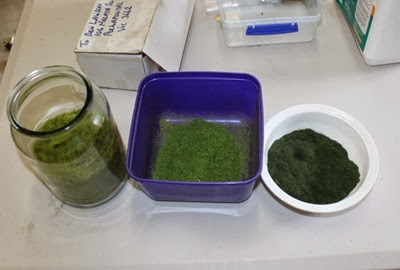
I am using three colours – the one in the glass jar is 5mm lengths and the main one I am using.  The other two shades are both 2mm lengths.  All are from the Heki range which is available at my LHS.  There is a bloke handy who does a lot more varieties and in smaller packs – didn’t know at the time I purchased! 
 
5mm scales at 2’6” high which by Australian standards is high grass – the home of some sort of snake which will kill you in 10 mins most likely.  In the UK, it means the weather has been warm but wet and no-one has been able to mow.  On a layout, whilst high it looks right.  The 2mm stuff – scaling at 1’ high – just looked wrong.  All the looking was at NVD – normal viewing distance for an exhibition (remembering that this is a layout which has been on the local circuit and maybe again) – of 1m.  We figured the look was more important and as it looked right with 5mm grass, and wrong with 2mm, the 5 was used the most, and the 2mm for colouring.