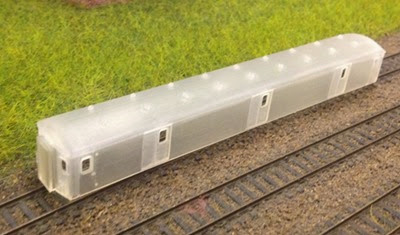
In March last year I made my first purchase from Shapeways. Regular readers will have seen my post about the Atso-Cad N2 which I obtained along with the Patriot kit from the same stable. I also purchased the kit for the Class 128. I mentioned at the time that it would go in the queue until such time as a chassis was obtained.
The initial idea of getting a cheap 121 or 122 from Hatton’s never came off – there wasn’t one cheap enough for me to be willing to chuck the body. I am not a big fan of having bodies lying around with no wheels. So I was stuck in a bit of a quandary.
A period trawl around the web thinking of useful search terms resulted in me finding that DCC Supplies had spare chassis. I guess that is one of the things spending time on the likes of RM Web or the N Gauge Forum will get you – but it doesn’t get a lot of modelling done! Still, I purchased a chassis and it turned up about a month ago.
Since then, I have been working on the model on and off with an eye to entering it in this years BRMA (Q) Modelling competition.
Initially the model got a good scrub in some warm water with a bit of kitchen sink cleaner. This got rid of the wax former which had stuck in the various corners. Then a coat of primer was sprayed on. Turns out primers aren’t primers and a plastic primer works better than my normal cheapie rattle can stuff. Still, job done eventually.
Then the annoying bit. I prefer to airbrush enamels. Problem is I have run out of my preferred Precision Paints BR Blue and as this model is going to be used on a 1975-1982 themed layout, that’s what I needed. Much stuffing around, including taking a Farish Class 47 to get colour matched (smallest they’d do was a 1 litre tin – that’s a lot of N Gauge models!) and help arrived in the form of some Railmatch Acrylics.
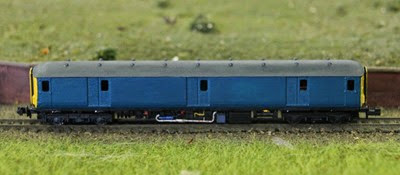
Now I have had bad experiences in the past with both Railmatch (enamels – hence my preference for Precision) and acrylics – Tamiya in my case but a fair few years back. So I was naturally hesitant. However, having given the Humbrol Rail Blue Acrylic a go (and finding that my attitude towards acrylic was confirmed) I figured the situation couldn’t be any worse. Happily, it worked out very well indeed, although I didn’t attempt to use the airbrush. Thinned with a bit of filtered water and about 4 coats later:
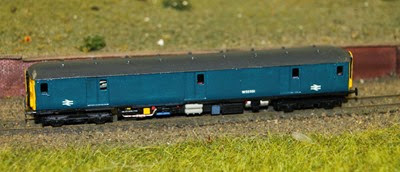
Next problem was the yellow – the photo above was taken after this had been sort of solved. I tried a novel approach, which involved painting some Humbrol 63 Sand on the ends. It looked pretty good, until I put it next to a Farish 101. Then it looked pretty ordinary. Still, I figured as a base coat, it should improve things. It did, sort of.
Yellow is one of “those” colours really. Still, weathering it should work out.
The next problem was what number. I model LMR generally but the kit is for a WR example. The LMR ones didn’t have gangways, but had a third window (and there was only 4, which seem to have been the first four scrapped). So a couple of evenings were spent trawling the web.
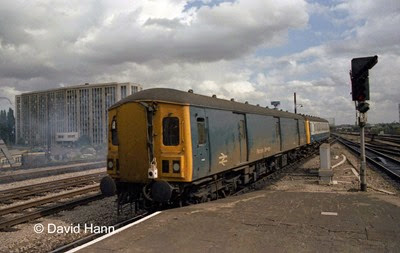
Turns out a 128 in Rail blue with gangways, head code boxes and round buffers is a bit of a difficult combination to source but I ended up very lucky and found this picture © David Hann (link):
Bingo I thought. However, it raised another issue. The model has holes for the Dapol lights to shine though into the head code boxes. As it happens, they are for the inside boxes, where as you can see in the photo the dominos are on the outside. Still, don’t have to have working lights.
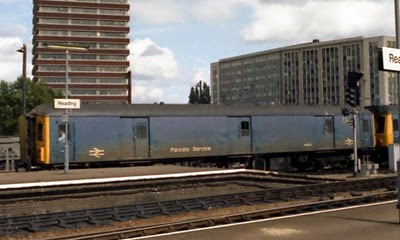
A bit more of a trawl around David’s photos on Flickr and I was lucky enough to find he had taken a picture of the arrival (the photo above shows the departure of W55991 and W55020) earlier the same day – which happens to be September 11, 1981(second bingo as it fits my time period).
I’ve cropped the photo down to just show 55991 – it’s still David’s © (link to original).
(As an aside, I have tried to find out on Flickr how to get in touch with David to seek his permission to publish his photos here. I couldn’t see how to so if someone could tell me, I’d appreciate it. As it isn’t for commercial gain, and I have acknowledged Copyright, hopefully there isn’t an issue.)
So this is what I am trying to achieve with my model. I have noted the half open window on the middle loading door. The driver is clearly seen in the cab door window too. And the leading end doesn’t have the exhaust (which I haven’t fitted to mine) There is also the weathering pattern.
My model has progressed, based on the second photo, to this:
Arrows put on, as has the number. I don’t have Parcels Service transfers, but I believe they are, unlike a lot of transfers, obtainable so I will have to get on and do that. I won’t glaze it until the handrails have been added, the exhaust pipes are on and footsteps are put under the doors, along with the final transfer. Once all that has been done, and it’s been glazed, then weathering. I have until November 21 to get it finished.

![IMG_2188[1] IMG_2188[1]](http://lh6.ggpht.com/-GPHrL-vvjGo/VNdBE-v3_nI/AAAAAAAAA4M/rEuzbYSLBnk/IMG_2188%25255B1%25255D_thumb%25255B5%25255D.jpg?imgmax=800)
![IMG_2189[1] IMG_2189[1]](http://lh5.ggpht.com/-XtzKPbKhFEY/VNdBGkqftfI/AAAAAAAAA4c/NeoiU2tTZCQ/IMG_2189%25255B1%25255D_thumb%25255B5%25255D.jpg?imgmax=800)


No comments:
Post a Comment